Last Updated on December 16, 2022 by Tech Questions
Adding more SATA ports to your PC is a relatively simple process that can be done by most computer users. There are a few different ways to go about adding more SATA ports, and the method you choose will depend on your specific needs and budget. One way to add more SATA ports is to simply purchase an expansion card that will fit into an available slot on your motherboard.
These cards typically have two or four additional SATA ports, which should be enough for most users. If you need even more SATA ports, you can purchase a PCI Express card with multiplexed connectors that will give you eight additional SATA ports.
- Purchase a SATA expansion card that is compatible with your computer’s motherboard
- Install the expansion card into an available PCI slot on your motherboard
- Connect any additional SATA devices to the new ports on the expansion card
- Boot up your computer and install any drivers that may be required for the expansion card
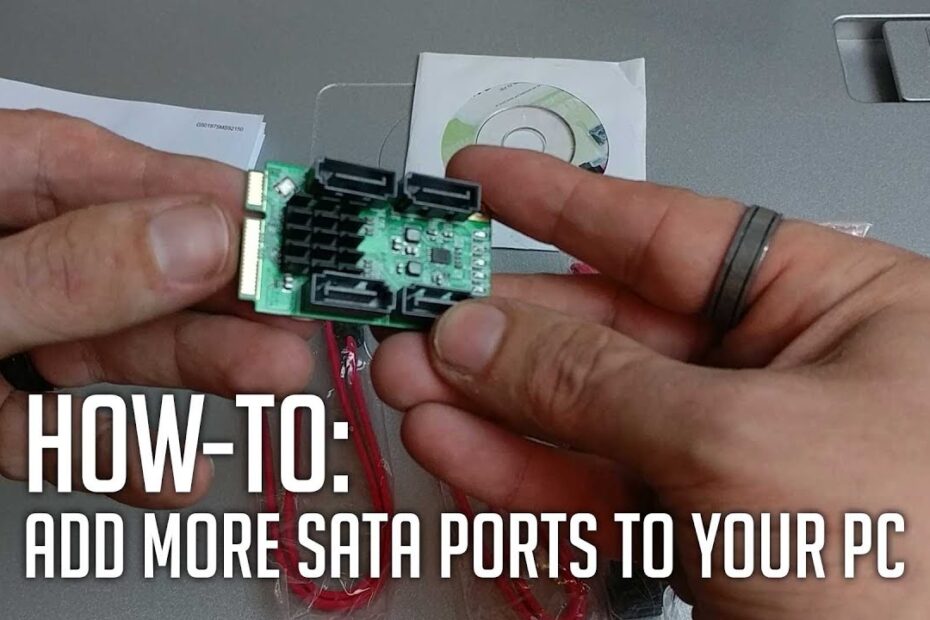
How-To: Add More SATA Ports to Your Computer
What If I Run Out of SATA Ports?
If you’ve ever wondered “what if I run out of SATA ports?,” then this blog post is for you. We’ll answer that question with accurate, in-depth and detailed information. SATA, or Serial ATA, is a computer bus interface used to connect host bus adapters to mass storage devices such as hard drives and optical drives.
SATA ports are typically found on the motherboard of a computer. Most motherboards have between two and eight SATA ports, but some high-end boards can have up to 16 SATA ports. So what happens if you need more than the number of SATA ports your motherboard has?
There are a few different options available to you. One option is to use a PCI Express (PCIe) card with additional SATA ports. This is a relatively simple solution and it’s easy to find PCIe cards with anywhere from two to eight additional SATA ports.
Just be sure to check that the card is compatible with your motherboard before purchasing it. Another option is to use an external enclosure that connects via USB or Thunderbolt. This solution requires an extra step as you’ll need to transfer your data from the internal drive(s) to the external enclosure, but it’s still fairly straightforward.
Plus, it gives you the added benefit of being able to easily disconnect and reconnect your drives as needed. These enclosures typically come in sizes that hold one or two drives, but there are also larger ones available that can hold four or more drives.
How Do I Install More Than 2 SATA Hard Drives?
Assuming you are asking how to install more than two SATA hard drives in a Windows 10 computer:
1. Shutdown your computer and disconnect all cables.
2. Remove the case cover and locate an available 3.5-inch or 5.25-inch internal drive bay. If necessary, remove the blanking plate from the drive bay using a Phillips head screwdriver.
3. Insert the first hard drive into the bottom of the cage and secure it using screws at each corner. Do not overtighten the screws as this can damage the hard drive.
4. Repeat this process for any additional drives, making sure to leave space between each drive for airflow (usually accomplished by alternate mounting).
5) For 3.5-inch HDD bays, use provided plastic rails that snap onto either side of HDD (if applicable), then slide HDD+rails combo into bay until it clicks/secures into place (or until there is no more room to insert further). If no plastic rails came with case/cage, then metal mounting brackets must be screwed onto sides of HDDs before sliding into place – make sure these are compatible with your particular model of motherboard!
Some cases come with universal metal brackets that will work regardless of motherboard compatibility issues (these usually have small holes along one side so that they may be mounted in multiple ways to accommodate different types of boards). Consult your motherboard manual for specific instructions on installing standoffs if needed and/or included hardware does not seem compatible.
6) For 5.25-inch optical bays, there should already be a preinstalled bracket inside – if not, one must be obtained separately before proceeding with installation (again, check compatibility issues with motherboard as some require speciality items).
Position HDD inside bay so that any connectors face outwards towards back panel I/O ports; once properly aligned, secure in place using provided screws at each corner (overtightening not advised as before).
7) Reconnect all power cables making sure each is inserted firmly into its appropriate socket on both ends – double check by lightly tugging on each cable until it feels snug and shows no signs of coming loose easily; do NOT force anything! If everything is plugged in securely but system still isn’t powering on, ensure PSU switch is set to “I” position (“0” position should only be used when PSU needs to be completely disconnected from power source).
How Do I Connect More Than 4 SATA Drives?
If you need to connect more than four SATA drives, there are a few different ways that you can do so. One option is to use a SATA controller card, which will add more SATA ports to your computer. This is a good option if you need to connect a lot of drives, or if you need extra features like RAID support.
Another option is to use a drive cage with multiple bays. This will let you connect several drives in one unit, and then just connect the cage to your motherboard using a single SATA cable. This is a good solution if you don’t need too many drives, and it can save some space inside your case.
Finally, some motherboards come with more than four SATA ports built-in. If this is the case for your motherboard, then you can just connect your drives directly to it without needing any extra hardware. This is the simplest solution, but it might not be possible if your motherboard doesn’t have enough SATA ports.
Whichever method you choose, connecting more than four SATA drives is relatively easy and should not cause any problems. Just make sure that you have enough power and data cables to reach all of your drives!
Using SATA Expansion Card
If you’re looking to add more storage to your computer, one option is to install a SATA expansion card. This type of card allows you to connect additional SATA devices, like hard drives or solid state drives, to your computer. Installing a SATA expansion card is relatively simple – just insert the card into an available PCI slot on your motherboard and then connect your SATA devices to the card.
In most cases, your computer will automatically detect the new hardware and you’ll be able to start using it right away. One thing to keep in mind is that depending on the number of devices you’re connecting, you may need more than one expansion card. Most cards support up to four devices, so if you have more than that, you’ll need multiple cards.
Also, make sure that your power supply can handle the additional load of any new drives you’re adding. Overall, installing a SATA expansion card is a quick and easy way to add more storage capacity to your computer. Just be sure to do your homework ahead of time so that everything goes smoothly.
Using PCI SATA Expansion Card
A PCI SATA expansion card is a type of computer hardware that allows a user to connect additional SATA hard drives to a computer through the PCI bus. This can be useful for expanding the storage capacity of a computer, or for adding extra hard drives for increased performance. There are a few things to keep in mind when choosing a PCI SATA expansion card.
First, make sure that the card is compatible with your motherboard and CPU. Second, check the number of available ports on the card- you’ll need one port per hard drive you plan on connecting. Finally, take into account the data transfer speed supported by the card- this will determine how fast your hard drives can operate.
Once you’ve chosen a suitable PCI SATA expansion card, installation is relatively straightforward. Just insert the card into an available PCI slot on your motherboard and connect your hard drives to the appropriate ports using SATA cables. Once everything is connected, power on your computer and BIOS should automatically detect the new hardware.
If not, consult your motherboard manual for instructions on how to enable it.
SATA Port Multiplier
The SATA port multiplier is a device that allows multiple SATA devices to be connected to a single SATA host port. This can be useful for connecting multiple hard drives or optical drives to a single port on your computer’s motherboard, for example. SATA port multipliers typically have one or more “master” ports and several “slave” ports.
The master port is connected to the SATA host port on your motherboard, while the slave ports are connected to the individual SATA devices. The port multiplier then manages the data traffic between the host and the various devices, allowing them to all operate as if they were connected directly to the host. One advantage of using a SATA port multiplier is that it can save you some money, since you don’t need to buy as many SATA controllers (which are typically built into your motherboard’s chipset).
It can also save you some space in your computer case, since you won’t need as many cables running around. There are a few things to keep in mind if you’re considering using a SATA port multiplier. First, not all motherboards support them – you’ll need to check your motherboard’s documentation to see if it does.
Second, they can add a bit of complexity to your system – if something goes wrong with one of the devices attached to the port multiplier, it can be difficult to troubleshoot since there are multiple potential points of failure. Overall, though, SATA port multipliers can be a handy way of expanding the number of storage devices you can connect to your computer without adding too much cost or complexity.
How Many SATA Ports Can You Use in PC?
SATA ports are the most commonly used type of storage port today. They are found in computers, laptops, and many other devices. You can use up to two SATA ports in a PC.
Conclusion
If you’re looking to add more SATA ports to your PC, there are a few different ways to do it. You can either use a SATA controller card, or a PCI Express expansion card. Both of these options will allow you to add additional SATA ports to your PC, giving you more flexibility when it comes to connecting storage devices.
I am a tech enthusiast who loves to write about the latest trends in the tech world. I am also a big fan of computer gaming and enjoy spending my free time tinkering with new software and hardware. I believe that technology can change the world for the better and I am always excited to learn about new developments in this field.