Last Updated on November 5, 2022 by Tech Questions
If you want to upgrade the CPU in your Acer Aspire 5517, it’s a pretty straightforward process. You’ll need to purchase a compatible CPU and then follow these simple steps. First, power down your laptop and remove the battery.
Next, locate the screws that hold the back panel in place and remove them. Then, gently pry off the back panel and set it aside. Locate the CPU socket on the motherboard and carefully insert your new CPU into it.
- Be sure to line up the pins correctly! Finally, replace the back panel and screw it into place. That’s all there is to it!
- If you want to upgrade the CPU in your Acer Aspire 5517, you’ll need to first remove the existing CPU
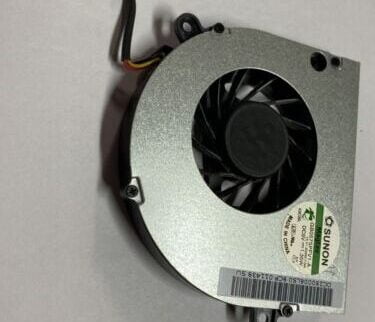
- To do this, you’ll need to unscrew the four screws that hold down the heatsink and fan assembly
- Once these are removed, you can carefully lift off the assembly and set it aside
- Underneath, you’ll see the socketed CPU
- Gently pull it out of its socket, being careful not to bend any of the pins
- Insert your new CPU into the socket, making sure that it is properly seated and aligned with the pin grid array
Acer Aspire 5517 Upgrade Part 1 of 2
Can You Upgrade CPU on Acer Aspire?
Yes, you can upgrade the CPU on Acer Aspire laptops. There are a few things to keep in mind when doing so, however. First, you’ll need to check what type of processor your Acer Aspire uses.
Second, you’ll need to make sure that the new processor is compatible with your motherboard. And finally, you’ll need to reinstall your operating system and any drivers for the new processor. If you’re not comfortable doing these things yourself, then it’s best to take your laptop to a qualified technician who can do the work for you.
Otherwise, follow the steps below at your own risk. To upgrade the CPU on your Acer Aspire:
1) Power off your laptop and remove all external devices (including the battery).
2) Flip over your laptop and locate the screws holding down the keyboard bezel. Remove these screws and set them aside. Carefully pry up the keyboard bezel and set it aside as well. You should now see the top of the keyboard and touchpad assembly.
3) Locate the screws holding down the heat sink assembly (these will likely be longer than other screws on the motherboard). Remove these screws and set them aside as well. Carefully pull up on the heat sink assembly to remove it from atop of the CPU (be careful not to bend any fins on the heat sink). Set the heat sink assembly aside as well .You should now see exposed the CPU itself(it will have a small heatsink attached to it with thermal paste in between).
4) Gently remove the CPU from its socket on motherboard (be careful not to touch any of the pins on bottom of CPU or get static electricity discharge onto any part of computer- this could damage components).
5) Take note of the orientation of CPU in its socket- there may be specific notch or cut out that must line up with a similar feature on the socket when replacing CPU, so you will want to match this installing newer/different model CPU.
6) Clean off old thermal paste from both top of CPU and bottom of heat sink using isopropyl alcohol and cotton swab – don’t skip this step!
7 ) Apply fresh layer of thermal paste on to center of CPU (you can use artic silver 5or similar product for this ).Place heat sink back into position and screw it using previously removed screws.
8) Lineup each pin on exposed side of processor with corresponding hole in processor Socket and carefully lower processor down into Socket until it is fully seated (again, don’t force this or you may bend one or more pins ). Once Processor is seated, replace keyboard using previously removed screws.
9 ) Reconnect power cord and boot up your laptop- BIOS should automatically detect new Processor Type and set default settings accordingly, but if you encounter problems at this point check your laptop’s manual for instructions on how to reset BIOS settings before continuing troubleshooting process.
10 ) Once laptop has successfully booted up to Windows desktop, open Device Manager by right-clicking My Computer icon > Manage > Device Manager and look under Processors to see if Windows has automatically installed driver software for new Processor Type.
Can I Upgrade My Laptop Processor from I5 to I7 Acer?
If you have an Acer laptop with an Intel Core i5 processor and are wondering if you can upgrade to an i7, the answer is maybe. It depends on a few factors such as what generation of CPU your i5 is and what socket it uses. If your laptop is fairly new (say, from the past five years or so) and has an Intel “Skylake” or newer processor, then there’s a good chance you can replace your i5 with an i7.
To do this, you’ll need to identify what socket type your CPU uses—LGA 1151 is the most common for Skylake processors—and purchase a compatible CPU cooler since the i7 will likely run hotter than the i5. Once you’ve got those two things sorted, installation is relatively straightforward: just remove the old CPU from its socket and insert the new one in its place, being careful not to touch any of the exposed circuitry on either chip. Then reattach your CPU cooler (making sure that thermal paste has been properly applied to both the top of the CPU and bottom of the heatsink) before screwing it back into place.
After that, power on your laptop and cross your fingers that everything POSTs correctly; if not, you may need to enter your BIOS/UEFI settings and enable XMP (Extreme Memory Profile) mode for your RAM sticks or manually set their speeds & timings.
Is Acer Aspire 5 CPU Upgradable?
The Acer Aspire 5 is a great choice for those in the market for a new laptop. It’s got a lot of features that make it a great value, including a Full HD display, an Intel Core i5 processor, and 8GB of RAM. But one of the best things about the Acer Aspire 5 is that its CPU is upgradable.
That’s right, if you find yourself needing more power down the road, you can easily upgrade the processor in your Acer Aspire 5. All you’ll need is a compatible CPU and a Phillips head screwdriver. Just unscrew the four screws on the back of the laptop, remove the old CPU, insert the new one, and screw everything back in place.
Of course, before you go upgrading your CPU, you’ll want to make sure that your other components are up to snuff. The Acer Aspire 5 only supports processors up to 65 watts, so anything beyond that will be overkill (and likely cause thermal throttling). You’ll also want to check compatibility with your motherboard and BIOS; not all CPUs will work with all motherboards/BIOS versions.
But assuming everything checks out, upgrading your Acer Aspire 5’s CPU is a quick and easy way to give it new life down the road.
Can Acer Aspire 3 Change CPU?
If you have an Acer Aspire 3 and want to change the CPU, there are a few things you need to know. First, the Acer Aspire 3 uses a BGA1356 socket, which means that it is not compatible with all CPUs. Second, the maximum TDP (thermal design power) for the Acer Aspire 3 is 15 watts.
This means that you can only use a CPU with a TDP of 15 watts or less. Third, the BIOS on the Acer Aspire 3 must be updated in order to support newer CPUs. Finally, you will need to purchase a CPU cooler since the stock cooler is not good enough for anything above 15 watts.
Acer Aspire 5517 Ram Upgrade
If your Acer Aspire 5517 is running slowly, you may want to consider upgrading the RAM. RAM stands for Random Access Memory, and it is a type of computer memory that stores data temporarily. The more RAM you have, the faster your computer will be able to process information.
Here are instructions for upgrading the RAM on your Acer Aspire 5517:
1. Turn off your computer and unplug all cords from the power outlet.
2. Remove the battery pack from the bottom of your Acer Aspire 5517 laptop by unscrewing the two silver screws that hold it in place.
3. Find the empty slot for another RAM chip on your motherboard inside the Acer Aspire 5517’s casing. It will look like a black rectangle with tiny metal contacts on one side. 4. Carefully insert the new RAM chip into this slot at a 45 degree angle, then gently push it down until it is flat against the motherboard surface. Make sure that all of the tiny contacts on the RAM chip are touching the matching contacts in the motherboard’s memory slot; otherwise, IT may not work properly!
Conclusion
If your Acer Aspire 5517 is running slowly, you may want to consider upgrading the CPU. This is a relatively simple process, and there are a few different ways to do it. One way is to use an aftermarket CPU that is compatible with your motherboard.
Another way is to replace the existing CPU with a more powerful one. To upgrade the CPU, you will first need to remove the old one. To do this, you will need to unscrew the four screws that hold it in place.
Once you have done this, you can simply pull out the old CPU and insert the new one in its place. Make sure that you line up the pins correctly before screwing it in place. Once you have replaced the CPU, you will need to reinstall any software that was installed on your computer previously.
You may also need to update your BIOS if your motherboard supports it.
I’m a tech enthusiast with a passion for writing about all things tech-related. I’m always on the lookout for the latest and greatest technology, and I love sharing my findings with others. I have a keen mind for computer networking and troubleshooting, and I’m always happy to help others fix their tech problems. In my free time, you can usually find me tinkering with computers or building new networks.